Gel Stain Over Paint Kitchen Cabinets
HOW TO APPLY GEL STAIN TO FINISHED WOOD | VIDEO TUTORIAL
Happy Tuesday! Can you believe it's already November?!
To kick off the month, I'm sharing how Gel Stains can save you time, money, and effort… while updating ANY existing wood finish!
I just finished re-staining these french hanging doors. They had an existing finish with an orange-yellow stain but not anymore…I can't wait for you to see the NEW look! Gel Staining works amazing with outdated furniture, kitchen cabinets, stair rails, doors, or pretty much any finished wood you've been thinking of replacing. I hope these hanging french doors inspire you to give it a try!
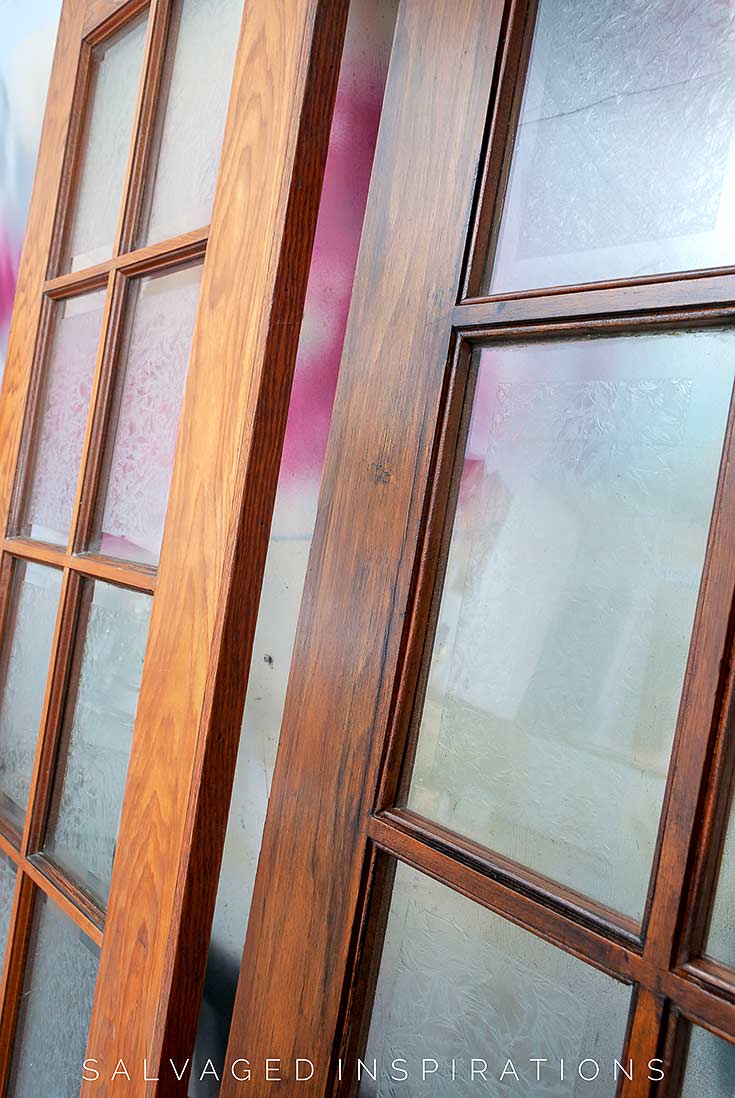
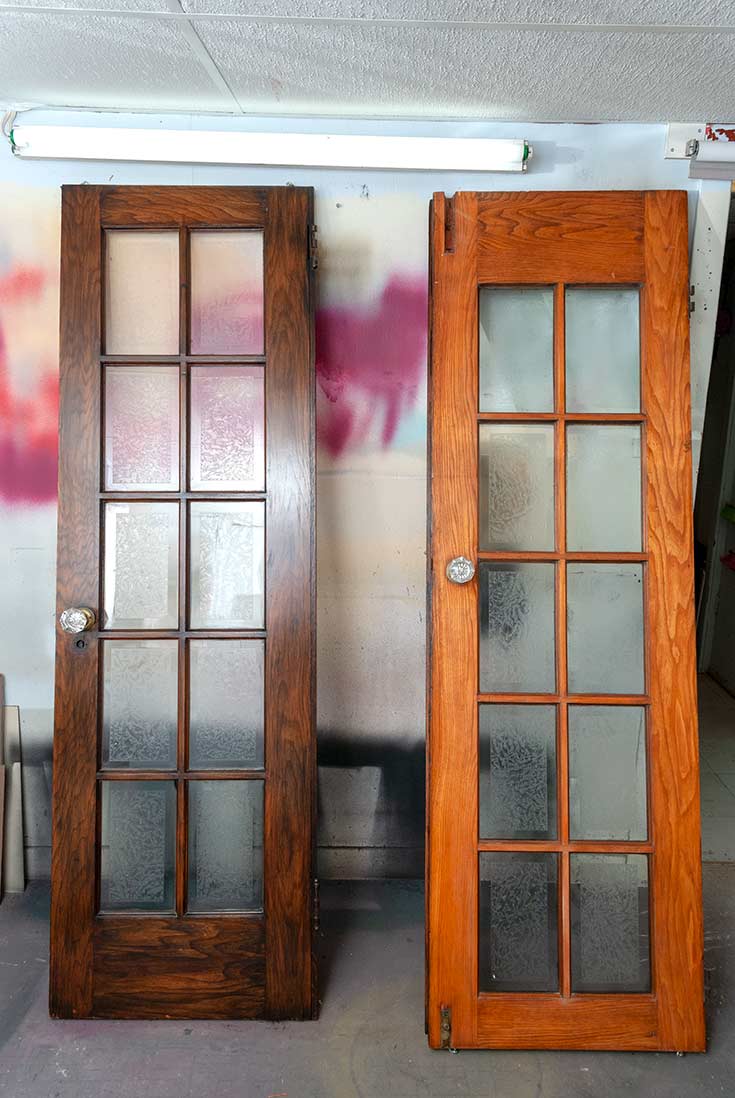
Here's what these doors looked like before. They hang in my living room to block off the mess that's usually in my dining room aka my staging/photography room.

And here they are in progress…
THIS POST IS SPONSORED/CONTAINS AFFILIATE LINKS TO PRODUCTS I USE. YOU CAN SEE MY FULL DISCLOSURE HERE.
SOURCE LIST
-
- French Doors – SALVAGED
- Sandpaper | Shop Towels
- Applicator Pads | Gloves
- Mythol Hydrate or White Lightening
- Chip Brush | Paint Brush
- Colonial Black Gel Stain
- Satin Clear Coat
How To Apply Gel Stain To Finished Wood
I'm using these french doors as an example but gel stains can be used on ANY existing finish. Kitchen cupboards, cabinets, previously stained furniture, factory finished, wood, veneer or laminate, and even previously painted finishes. This is because unlike traditional stain, gel stains don't penetrate the surface. Instead, they sit on top of a surface more like paint but gives the appearance of stain because it gives a 'see-through' color while allowing grain or the surface below to be displayed.
Here's the full video tutorial. If you have any trouble viewing it in your browser, feel free toclick on my Youtube Channel here… and don't forget to subscribe! 🙂
PREP
Dirt, grease, furniture wax, or polish will interfere with the adhesion of the gel stain so a thorough cleaning is required.
Because Gel Stains are an oil-based product, I recommend wiping down the surface with a 50/50 denatured alcohol and water. Or you can substitute denatured alcohol for a 50/50 Methyl Hydrate and water solution. You can also give it a good cleaning with a TSP or White Lightning. If using the latter, just make sure all the remaining residue is taken off with clean water.

It's also a good idea to prep your area …and yourself! I always wear gloves when using Gel Stains because it will stain your skin. Drop cloths to protect your floors and work area and good ventilation and masks are a good idea.
SCUFF SAND
Scuff sand the existing finish with a 120-220 grit sandpaper. I like doing this by hand because nothing crazy is needed and sanders can be too harsh. I sand the surface as if I was wiping down my kitchen counter. You want to slightly scuff the existing finish but you don't want to scratch the finish because Gel Stain does not cover scratches or imperfections.
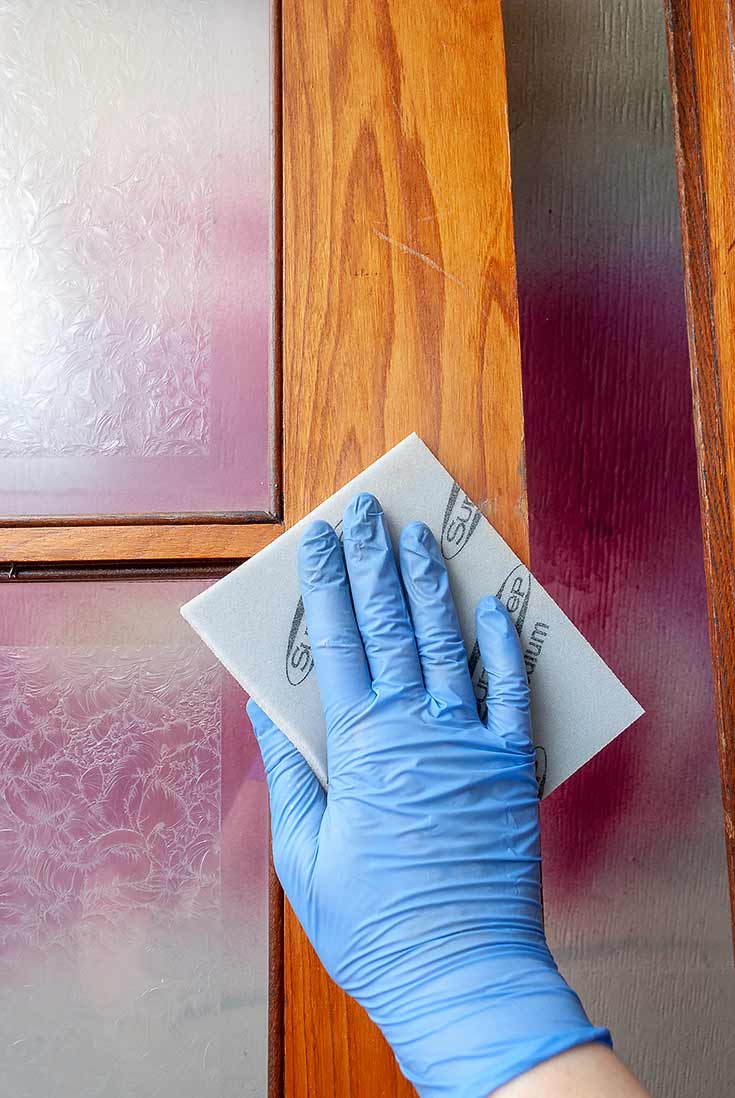
After sanding, I remove all the dust with a tack cloth.
CHOOSING GEL STAIN COLORS
When staining over an existing finish, it's much easier and safer to go darker rather than lighter.
Keep in mind, because you're applying a new stain to an existing color and finish, the color you choose will be altered because the original finish will show through somewhat.
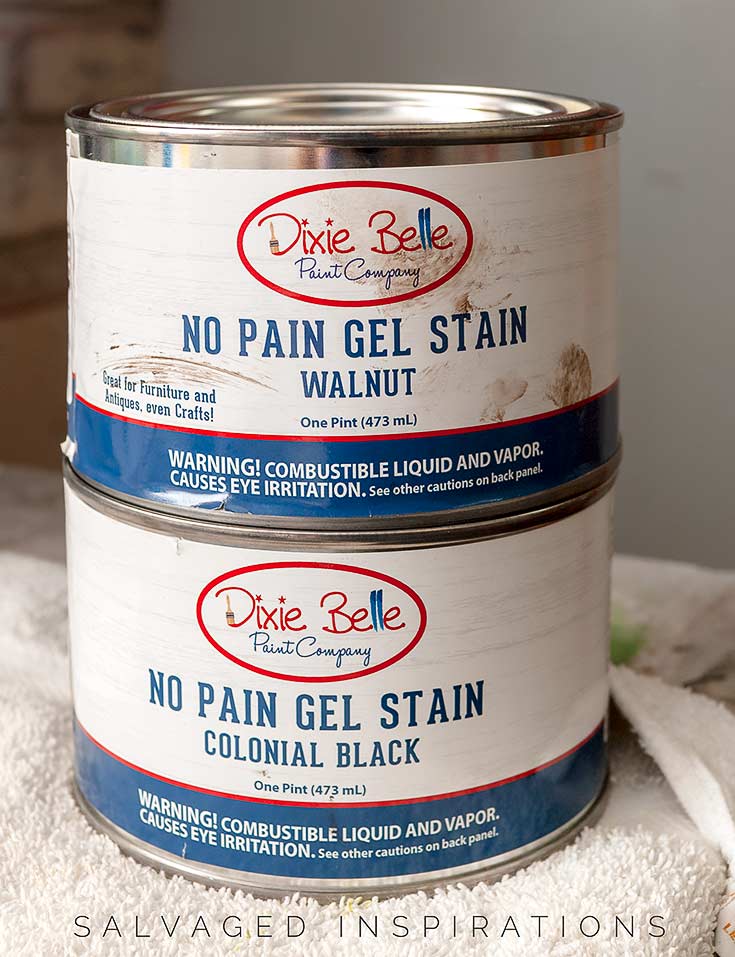
For instance, I tried Walnut and this Colonial Black and decided on the black. It cuts down on the orange-yellow stain of these doors BUT I still don't have a TRUE black stain. I have a darker stain with the warm undertones showing through which reminds me of a Dark Walnut.
If you're unsure, I suggest buying a few stains and testing them in an inconspicuous area of your project. If you're still not 100% happy, you can MIX Gel Stains or layer them. They are very versatile and it's fun to play around to get the look your after.
HOW TO APPLY THE GEL STAIN
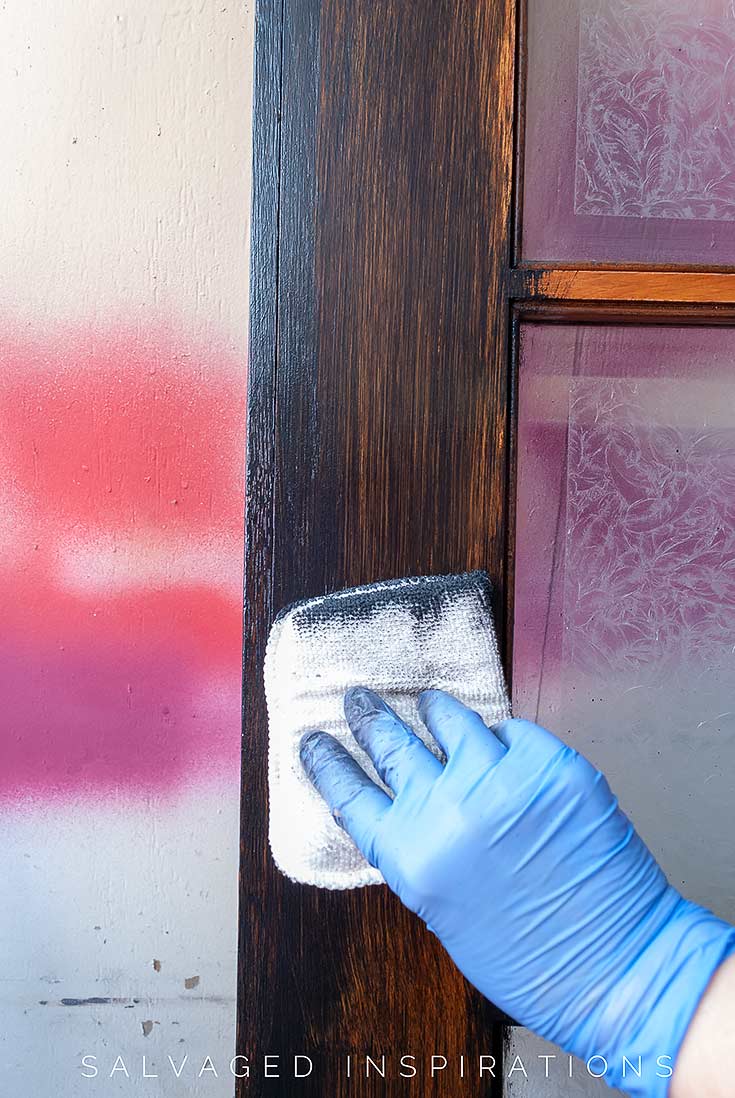
Once you've decided on a color, open the can and give it a good stir. Using a shop towel, applicator pad, chip brush, or lint-free rag, apply the gel stain working in manageable areas. I'm working with these doors propped up against my studio wall. Because Gel Stain is thick, like a pudding or shoe polish, there's no dripping.
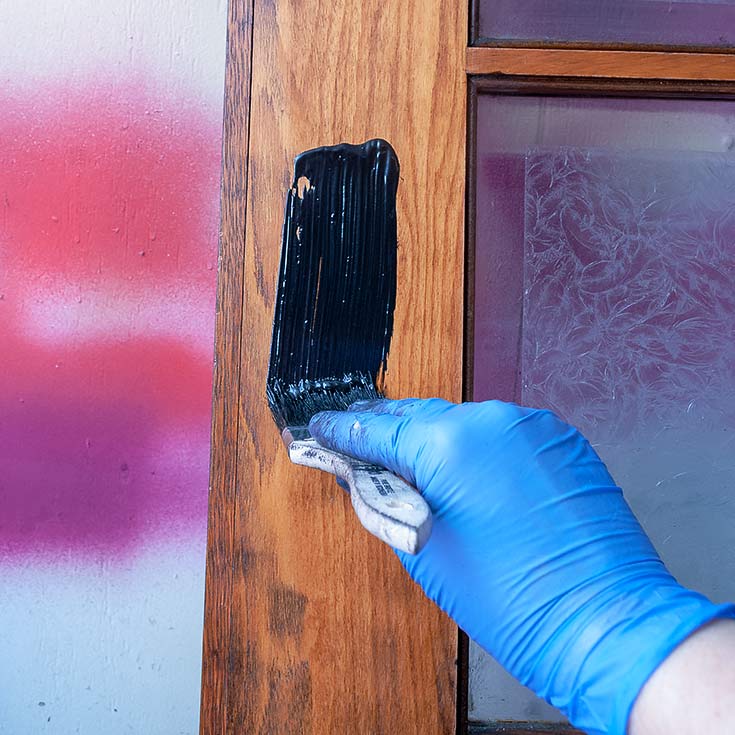
After it's applied, wipe the stain back and smooth it out with the tool of your choice. For these doors, I used an applicator pad and then a shop towel to get the look I liked.
Thin even layers give the best results. And if the first coat is not dark enough, you can always apply additional layers to darken the effect. Here's the finished look. Big difference don't you think?
Here's a close-up.
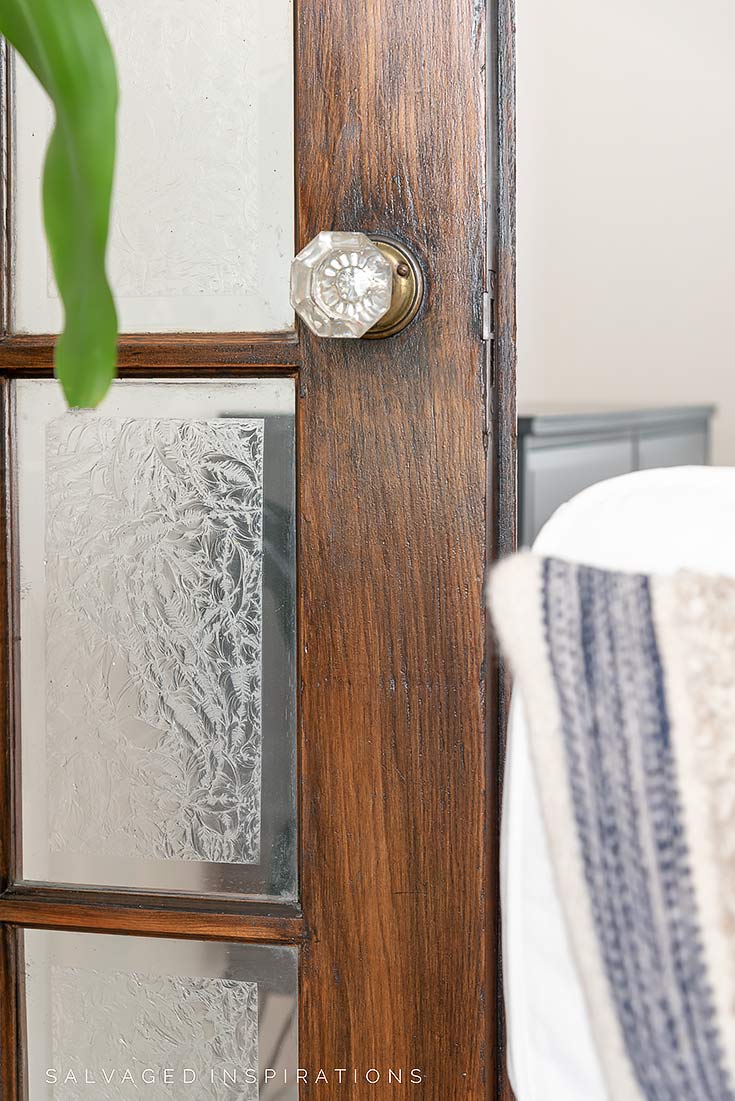
I'm SUPER happy with one coat. It really cut down on the yellow-orange stain and the grain is still showing through beautifully.
TOPCOATING THE GEL STAIN
It's recommended to let the gel stain dry for 72 hours before top-coating so I haven't top coated these doors yet because I wanted to get the post out to you. You can apply a water-based topcoat over this oil-based stain but it MUST be 100% dry!
12 GEL STAIN FAQ'S
1. Do I need to stir the product before using it?
Yes
2. Can I use a slip coat for easier application and longer working time?
Yes. Mineral spirits work well as a slip coat or you can mix in a little spirits in with the stain to slightly thin the gel stain.
3. Can I custom mix Gel Stains to create my own colors?
Yes! Gel Stains colors can be mixed together OR you can layer them. For instance, you can use a Walnut on your first coat. Let dry. Use a Colonial Black on the second coat. This adds really nice depth to the stain.
4. What will remove the Gel Stain if I make a mistake?
Mineral Spirits will help remove any mistakes on finished wood. For your hands and skin, you can use baby oil or ANY oil like vegetable oil or olive oil for your fingers and hands.
5. Can I apply a gel stain and let it absorb into the finish?
No. Gel stains are topical. They don't penetrate into the wood as traditional stains do. It's more like a paint stain. Gel Stains are highly pigmented like a paint/stain combo and they do not sink into the wood but rather sit on top of it. This is why they CAN be used to cover up an existing finish! Light even coats are recommended so you don't end up with a tacky mess. If it's applied too heavy or unevenly, you want to wipe it back and even it out for a beautiful uniform finish.
6. What brands of Gel Stain are available?
I've used Varathane, Minwax, General Finishes, and Dixie Belle but there are probably others I'm not aware of or haven't tried yet.
7. What should you use to apply the Gel Stain?
I usually use a variety of tools to apply and remove my gel stains. My go-to's are cheap chip brushes, foam brush, applicator pads, shop towels, and lint-free rags. If you're working with a really large surface, you can even use a foam roller.
8. Do Gel Stains only work on wood?
Gel stains work beautifully on wood, veneers, laminates, and/or painted surfaces!
9. How many coats are required?
This is totally up to you. For these doors, I was really pleased with just one coat! However, if I were to want a darker opaque finish, I could have applied another one or two thin coats. The more coats, the darker and more opaque your finish will be.
10. Do I need to sand between coats?
You can give it a VERY light sanding between coats with a finishing pad (320 grit or higher). For these doors, I didn't bother but if I were doing a dining table and wanted a perfectly smooth finish, sanding in-between is helpful. Do not sand the last coat before topcoat though. In my opinion, it's not needed.
11. Does Gel Stain cover scratches or imperfections?
It won't cover water spots, scratches, or gouges but you can "hide or disguise: them by using a little heavier gel stain or doing faux finishes.
12. How long does it take Gel Stain to dry?
Depending on the temperature and humidity, gel stains can feel dry to the touch in 6-8 hours but you should give them a proper 24 hours to dry between each coat. For top coating, 72 hours is recommended.
BONUS
Can I use Gel Stains like a glaze?
Yes! Gel Stains can be used to glaze, distress, OR create faux finishes!
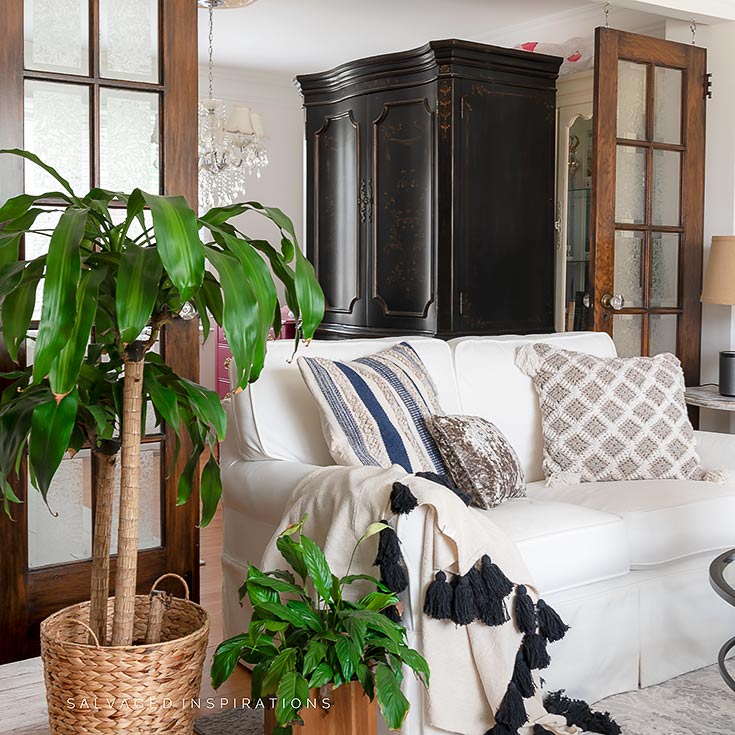
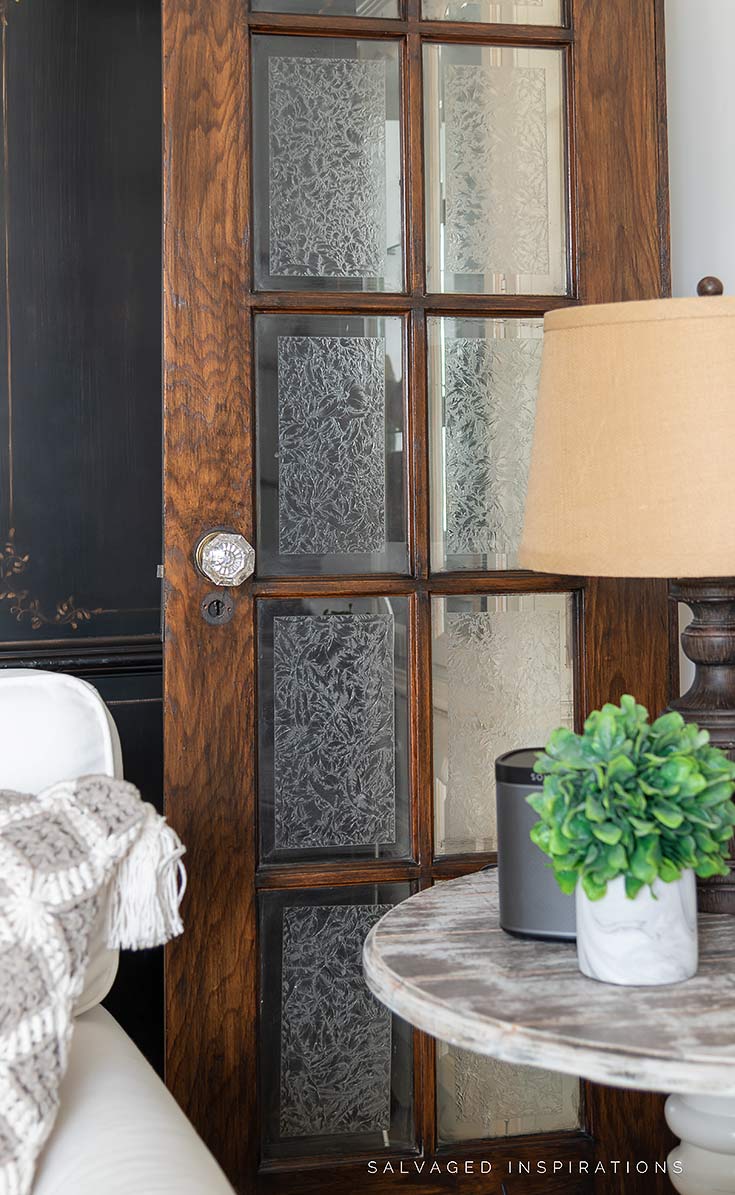
My french doors are hanging back up …somewhat hiding my staging room mess. 😉 I love the new look!
Gel Stains are an amazing way to save time, money, and effort. They are a time saver because you don't have to strip and sand down to bare wood to start from scratch. Gel Stains can totally transform an existing finish so you can save $$$ on DIY rather than buying new cabinets or furniture. And they are easy to apply. No drips. And YOU control how light or dark you want the finish.
I hope I've inspired you to give them a try!
HAVE YOU OR WOULD YOU TRY GEL STAINS ON AN EXISTING FINISH? FEEL FREE TO ASK ANY QUESTIONS YOU MAY HAVE. I ALWAYS LOVE HEARING FROM YOU. 💕
Thanks for reading. 🙂
Wishing you a beautiful day filled with inspiration and Happy Staining!
Denise XO
RELATED POSTS::
How To Apply Gel Stain | Step by Step
Weathered Gray Stain Tutorial
10 Tips For Staining Furniture
Staining Pine With Gel Stain
Stain OVER Stain | How To Tutorial
PIN AND SHARE!

Gel Stain Over Paint Kitchen Cabinets
Source: https://salvagedinspirations.com/how-to-apply-gel-stain-to-finished-wood/